Showing posts with label cake. Show all posts

Monday, January 14, 2013

I Pinned, I Made: Peanut Butter Cream Cheese Frosting


There aren't many things better than the classic combo of chocolate and peanut butter. I mean, really! They are perfect for each other!

Does the picture tempt you?!


It's shameful, I know...as I'm supposed to be getting rid of the sweets leftover from the holidays, but I wanted to try two different things I found on Pinterest.

The first was doctoring up a cake mix to taste like a bakery cake. Well, I've got to admit, I haven't eaten many (or any?) bakery cakes...but, it made it sound like my cake mix would be elevated to much better standards.

So, I tried it. Add 1 more egg than the box calls for, substitute (and double) the oil called for with melted butter, and instead of water, use milk.

Meh. It was good, but it wasn't fabulous by any means. Not worth wasting butter on. If you want your butter to go to good use, make THIS. Nom, nom, nom!!!

And, I'd recommend THIS chocolate cake if you want to have happy cupcakes!

Anyway, on to the second pin: the peanut butter frosting.

Yum.

To be honest, I don't think I've met a peanut butter frosting I haven't liked. ;-)

But, I did keep this version after a few of my own additions. It was smooth, creamy, not overly sweet, and how can you go wrong with the addition of cream cheese?

If you need just the right PB buttercream for your next cake, pick this one!


Peanut Butter Cream Cheese Frostin'

1 block (8 oz) cream cheese, softened
1/4 cup (half a stick) softened butter
1 teaspoon vanilla extract
4 cups confectioners' sugar
2/3 cup of creamy peanut butter (do not use 'natural,' the kind you need to stir)
2-3 tablespoons milk or cream

Be sure the cream cheese and butter are at room temperature before beginning. With an electric mixer, cream together cream cheese and butter. Add vanilla and 2 cups of confectioners' sugar. Blend until smooth. Add remaining 2 cups of confectioners' sugar, peanut butter, and milk. Combine until smooth.

Frost or fill decorator's bag and pipe onto cake (or fill a plastic gallon storage bag and snip a corner off! That's how I decorated mine - not fancy, but still just as tasty)!

Scarf 'em down or decorate with Reese's Pieces. :-)

Enjoy!!


blog signature

**DISCLOSURE: I was given a free product in exchange for an honest review. Please read my full disclosure policy HERE.**

Wednesday, October 24, 2012

Blueberry Muffins from The New Best Recipe


I've posted about blueberry muffins in the past HERE. 'To Die For' they were called. Mmm, yes, they were.

UNTIL I made the Blueberry Muffins from The New Best Recipe.


(Don't have that cookbook on your shelf yet?! You must. Besides tested and tried dishes, The New Best Recipe has illustrated kitchen tutorials and unbiased product ratings from America's Test Kitchen and it is over 1000 pages of ahh.maz.ing-ness)!


Ok, back to the muffins.


The New Best Recipe Blueberry Muffins should be called 'to die for' or 'the best' or something!

The added sour cream in NBR's recipe takes the cake...or muffin. The sour cream compliments the blueberries perfectly, making a most fabulous tasting muffin.

You must try them!

And, if you have the ingredients around to make the Lemon-Glaze following the recipe...oh, do! That puts these muffins over the top!

(When I don't have those ingredients, I use NBR's other topping variation: Cinnamon Sugar-Dipped OR I brush the muffin tops with a vanilla syrup [like DaVinci's coffee syrups] and sprinkle with turbinado sugar).

Oh, my mouth is watering! Time to share the recipe!

BLUEBERRY MUFFINS
from The New Best Recipe via acookingbookworm.com

2 cups (10 oz) unbleached all-purpose flour
1 tablespoon baking powder
1/2 teaspoon salt
1 large egg
1 cup (7 oz) sugar
4 tablespoons (1/2 stick) unsalted butter, melted and cooled slightly
1-1/4 cups (10 oz) sour cream
1-1/2 cups (7-1/2 to 8 oz) frozen or fresh blueberries

Preheat oven to 350 degrees. Grease a standard 12-cup muffin tin and set aside.

Whisk the flour, baking powder, and salt in a medium bowl until combined. Whisk the egg in a second medium bowl until well combined and light-colored, about 20 seconds. Add the sugar and whisk vigorously until thick and homogenous, about 30 seconds; add the melted butter in 2 or 3 additions, whisking to combine after each addition. Add the sour cream in 2 additions, whisking just to combine.

Add the berries to the dry ingredients and gently toss just to combine. Add the sour cream mixture and fold with a rubber spatula until the batter comes together and the berries are evenly distributed, 25 to 30 seconds (small spots of flour may remain, and the batter will be thick. Do not overmix).

Using a large spoon sprayed with nonstick cooking spray to prevent sticking, divide the batter among the greased muffin cups. Bake until the muffins are light golden brown and a toothpick or skewer inserted into the center of a muffin comes out clean, 25 to 30 minutes, rotating the pan from front to back halfway through the baking time. Invert the muffins onto a wire rack, stand the muffins upright, and cool 5 minutes.

Ginger- or Lemon- Glazed Blueberry Topping
While the muffins are baking, mix 1 teaspoon grated fresh ginger or grated lemon zest and 1/2 cup sugar in a small bowl. Bring 1/4 cup lemon juice and 1/4 cup sugar to a simmer in a small saucepan over medium heat; stir to dissolve the sugar and simmer until the mixture is thick and syrupy and reduced to about 1/4 cup. After the baked muffins have cooled 5 minutes, brush the tips with glaze; then, working one at a time, dip the tops in lemon sugar or ginger sugar. Set the muffins upright on a wire rack; serve.


blog signature

**DISCLOSURE: Please read my full disclosure policy HERE.**

Wednesday, May 9, 2012

Sweet Lemon Brownies


I LOVE lemony things. Sweet, tart, light, refreshing. Yum.

However, I'm not a big fan of Lemon Bars. They always taste egg-yolky to me. Blech.

When I found this recipe on Pinterest, claiming to be nothing like a Lemon Bar, I wanted to give them a try.

Imagine the moist, fudgy texture of a brownie, but bursting with bright lemon flavor! And then there's the sweet glaze...!

Ahh, yes! These were soo tasty! :-)

(My only complaint: I didn't double the recipe!) Nom. nom. nom!


So, if you love lemon too...make these! Now.

SWEET LEMON BROWNIES

3/4 cup flour
3/4 cup sugar
1/4 teaspoon salt
1/2 cup (1 stick) butter, softened
2 large eggs
2-1/2 teaspoons lemon zest
2 tablespoons lemon juice

Lemon Glaze
1/2 cup powdered sugar
1 tablespoon lemon juice
2 teaspoons lemon zest

Preheat oven to 350°F. Spray an 8-by-8-inch baking dish with cooking spray and set aside.

Zest and juice two small lemons (please don't try to substitute dried lemon zest and bottled juice. Use fresh!); set aside.

In a large bowl, beat the flour, sugar, salt, and softened butter until combined. Add the eggs, lemon zest, and lemon juice. Beat into the flour mixture at medium speed until smooth and creamy, about 2 minutes.

Pour batter into pan and bake for 25 minutes, or until just starting to turn golden around the edges and a toothpick inserted into the center comes out clean. Allow to cool completely before glazing.

When brownies are cooled completely, make the glaze by whisking together all three ingredients. Spread over the brownies, cut into bars, and serve!

Fabulous!

blog signature

**DISCLOSURE: I was given a free product in exchange for an honest review. Please read my full disclosure policy HERE.**

Tuesday, February 14, 2012

Another Birthday Cake!


We just celebrated another birthday in our house.


You can probably guess that it was for my little guy...

Tuesday, January 31, 2012

Craving Donuts?? Try these!


Did you miss this recipe the first time around??

I'm craving donuts today, so I thought I'd better share these delicious Doughnut (Hole) Muffins with you again!

They're (almost) healthy! Well, at least healthier than something you could pick up at the DD drive-thru and, in my opinion, better tasting!!

They're quick and easy, too! So, go get the recipe HERE!

blog signature

**Disclaimer: Post *may* contain affiliate links.**

Tuesday, February 8, 2011

Frozen Buttercream Transfers... and Humble Pie

I told you I'd blog about how to make a FBCT (frozen buttercream transfer) if mine didn't fall apart.

Well... I'm blogging about it anyway. ;-)

HERE is a great tutorial on how to make a Frozen Buttercream Transfer.

I first made a FBCT for my daughter's second birthday. It wasn't that difficult - just time consuming - and I thought Curious George turned out cute!


So, when my little guy's birthday rolled around, I searched the internet and found a beautiful inspiration cake and wasn't afraid to attempt a FBCT again:


Perhaps I should have been! ;-)

No, don't let my final cake scare you! I'm keeping it real and showing you how it turned out:


*Gulp.* Yeah, not quite what I had in mind. For some reason, my FBCT didn't 'F.' Never froze. It was in my freezer for four days... :-(

Of course, I didn't know it wasn't 'hard' until I tried peeling off the wax paper. What a disaster. Most of Buzz and Woody stayed on the wax paper...

I began digging through my little guy's car collection, trying to find his dump truck and backhoe with the intention of scraping off all the frosting, starting again, and placing some cars and trucks on top.

Before I could scrape that frosting off, my little guy came into the kitchen saw my HORRIFIC Buzz and Woody...and you know what he said?

"Mommy! I WUV my cake!"

So, that was that. I ended up keeping most of the wax paper on the FBCT/cake just to preserve the image as much as I could.

If your child likes it, that's all that matters, right? :-)

By the way, if you're a visual learner, like I am, here's a fun video of a FBCT:


Recommend: YES

blog signature
___________________________________

Friday, October 15, 2010

Raspberry Cream Cheese Coffee Cake

Wow.

It is so time for a non-book review post! ;-)

My husband just finished a 6-month long addition project, and my mother-in-law is now our new 'neighbor.'

Needless to say, we've been pretty busy.

Although I've still been trying new recipes here and there, most of our meals have been super quick and not worthy of blog posts!

But THIS...!

This Raspberry Cream Cheese Coffee Cake is certainly worthy to be posted!


It was FAN.TAB.U.LOUS!!!


Perfect for brunch or overnight company! Or just eat the whole thing yourself! ;-)

I found the recipe over on Krista's blog and I hope you'll give it a try! Mmmm, yummy!

RASPBERRY CREAM CHEESE COFFEE CAKE

2-1/4 cups all-purpose flour
3/4 cup sugar
3/4 cup cold butter
1/2 teaspoon baking powder
1/2 teaspoon baking soda
1/4 teaspoon salt
3/4 cup sour cream
1 egg, beaten
1 teaspoon almond extract

FILLING:
1 (8 oz) package cream cheese, softened
1/2 cup sugar
1 egg
1/2 cup raspberry jam (I used seedless)
1/2 cup sliced almonds

In a large mixing bowl, combine flour and sugar. Cut in butter until mixture is crumbly. Remove 1 cup and set aside. To the remaining crumbs, add baking powder, baking soda, salt, sour cream, egg, and almond extract; mix well. Spread in the bottom and 1 inch up the sides of a greased 9-in springform pan.

For the filling, in a small bowl, beat cream cheese, sugar, and egg in a small bowl until blended. Pour over batter; spoon or pipe raspberry jam on top. Swirl with a knife. Sprinkle with almonds and reserved crumbs.

Bake at 350 degrees for 45-55 minutes or until golden brown. Let stand for 15 minutes. Carefully run a knife around the edge of pan to loosen; remove sides from pan. Serve warm or cool. Refrigerate leftovers.


Recommend: YES

blog signature
**Disclaimer: Each review is based on the reactions and opinions of myself and/or family. Post *may* contain affiliate links. If you click on them and decide to make a purchase, I receive a (very!) small commission. Hey, every little bit helps! So, I thank you! :-).**
___________________________________

Wednesday, September 15, 2010

Hot Fudge Sundae Cake

When I'm feeling like ooey-gooey warm chocolate, but I don't have anything in the house that quite fits the bill, enter my trusty Betty Crocker cookbook, stained and wrinkled page 140!

Hot Fudge Sundae Cake always comes to the rescue!
I've been making this Hot Fudge Sundae Cake for years. And before that, I remember my mom making it many, many times.

Made with ingredients that I always have in the pantry,the Hot Fudge Sundae Cake can fulfill my chocolate longing in about an hour!

A quick and fudgy cake that is perfect for these cooler days!

HOT FUDGE SUNDAE CAKE

1 cup all-purpose flour
3/4 cup granulated sugar
2 tablespoons baking cocoa (when I feel super chocolate-needy, I add an extra tablespoon!) ;-)
2 teaspoons baking powder
1/4 teaspoon salt
1/2 cup milk
2 tablespoons vegetable oil
1 teaspoon vanilla
1 cup chopped nuts (optional)

1 cup packed brown sugar
1/4 cup baking cocoa
1-3/4 cups very hot water

Ice cream, whipped cream, or cool whip, if desired.

Preheat oven to 350 degrees.

Mix flour, granulated sugar, 2 tablespoons cocoa, baking powder, and salt in ungreased square 9x9x2 baking dish. Mix in milk, oil, and vanilla with fork until smooth. Stir in nuts. Spread evenly in pan.

In a small bowl combine brown sugar and 1/4 cup cocoa. Sprinkle over batter. Pour hot water over batter.

Bake 40 minutes or until top is dry.

Spoon warm cake into dessert dishes. Spoon sauce from pan onto each serving. Top with ice cream or cool whip, if desired.

Recommend: YES

blog signature
___________________________________
**Disclaimer: Each review is based on the reactions and opinions of myself and/or family. Post *may* contain affiliate links. If you click on them and decide to make a purchase, I receive a (very!) small commission. Hey, every little bit helps! So, I thank you! :-)**

Monday, July 12, 2010

Tina's Hot Water Cake

Have you ever visited Heidi over at Tried-and-True Cooking with Heidi? You haven't?! Well, you should! She posts fabulously delicious and easy recipes for the entire family!

On a day that I happened to be craving chocolate (ok, that's any ol' day! lol!), Heidi posted about this cake that one of her coworkers makes. I had all of the ingredients, so I whipped it up.

Oh man, oh man! YUMMM!!

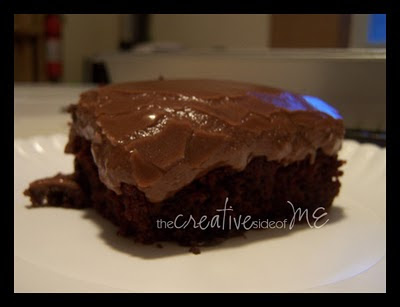
Tina's hot water cake I took the picture before my frosting had time to 'set,' but believe me, I just couldn't wait any longer!

The cake is perfectly moist and chocolate-y. The cake recipe alone is a keeper for a homemade chocolate cake!

And the frosting... oh! Oh! Oh!!! Soooo goooood! Like, making-me-drool-just-thinking-about-it-again GOOD! ;-)

TINA'S HOT WATER CAKE

Sift together:

2 cups flour
2 cups sugar
1/2 cup cocoa
1 TBSP soda
1 tsp salt

Add & mix:
1 cup oil
1 cup buttermilk (Don't have buttermilk? Don't worry - here's my go-to substitution!)
1 tsp vanilla

Add:
1 egg (I mixed the egg in before I added the boiling water - I didn't want to risk scrambled eggs in my cake!)
1 cup boiling water

Grease 9 x 13 pan. Pour in batter and bake at 375 for 40 minutes or until toothpick stuck in meddle comes out clean.

CHOCOLATE FUDGE FROSTING

1 cup margarine
3/4 cup sugar
1/4 cup milk
2 TBSP cocoa
2 cups powdered sugar
1 tsp vanilla

In saucepan, cook and constantly stir margarine, sugar, and milk for two minutes on medium heat. Cool. In a bowl mix cocoa, powdered sugar, and vanilla. Beat in cooled milk mixture until smooth. Add more milk or powdered sugar if needed. Pour on cake. Heidi's specific note: Wash face to remove the frosting you got on it from licking out the bowl :)

Heidi, Thanks for passing on such fantastic recipes...and thank Tina when you see her! ;-)

Recommend: YES

blog signature

___________________________________
Tags:

Friday, April 23, 2010

The "Real Food Project" by Hellmann's® and Chocolate Mayo Cake!

Very few products that I buy are brand name. My experience with most store-brand items have been positive, not to mention easier on my budget!

However, I have a definite preference for brand names in regard to personal products, ranch dressing, and MAYONNAISE.

And Hellmann's® is my mayo choice!


Celebrity chef Bobby Flay (mine and hubby's favorite Iron Chef!) and actress/mom Lori Loughlin have teamed up with Hellmann's® and Best Foods® Mayonnaise to unveil the Real Food Project on Hellmanns.com, a comprehensive online resource offering tips and ideas on how to create real meals made with Real Food.

Because videos are great for multi-tasking moms, The Real Food Project features a series of entertaining how-to tutorials, hosted by Bobby Flay, to give us tools and techniques to prepare great-tasting, at-home meals for our families.

Just by visiting www.Hellmanns.com, you can access a wide range of recipes, including sandwiches, entrees and side dishes, all designed to please picky palates. There are even chances to WIN great prizes like a kitchen essentials bundle, Bobby Flay Grill It and Hellmann's® and Best Foods® products by playing the "Wheel of Real" instant win game and entering the Real Food Sweepstakes.

So what are you waiting for?? Head on over to Hellmann's® Real Food Project for some amazing recipes like Ham Salad on Biscuits, Honey Mustard Chicken Fingers, or Asian Slaw.

Here's another fantastic way to use Hellmann's® - a chocolate mayonnaise cake!

Chocolate Mayonnaise Cake

3 cups all-purpose flour
1 1/2 teaspoons baking soda
1 1/2 cups white sugar
1 1/2 cups mayonnaise
1/3 cup unsweetened cocoa powder
1 1/2 cups water
2 1/4 teaspoons baking powder
1 1/2 teaspoons vanilla extract

Preheat oven to 350 degrees . Lightly grease one 9x13 pan.

Mix flour, baking soda, baking powder, cocoa, and sugar into a large bowl. Stir in mayonnaise. Gradually add water and vanilla and blend until smooth. Pour batter into prepared pan.

Bake at 350 degrees for 30 minutes. Cool.

Slather with your favorite frosting! (I recommend peanut butter! Make your own, or I stirred 1/2 cup of peanut butter into a tub of cream cheese frosting -- delish)!

Recommend: YES
Thanks to MomSelect for the opportunity to share Hellmann's® Real Food Project with my readers!

blog signature
SocialTwist Tell-a-Friend

**Disclaimer: I was entered for a chance to win a Hellmann's® prize package in exchange for this post. No monetary exchange took place.**
___________________________________
Tags:

Monday, February 8, 2010

Birthday Buttercream

I just finished eating some birthday cake and ice cream. Yum, yum!

My little guy is quickly leaving babyhood. *sob* *sniff*

I worked hard last night, decorating his special cake.


At the moment, we're all about Thomas in our house.


Wish I could claim full creative credit for his cake, but I can't. :-) I found several amazing train cakes all over the internet, but based this one on a cake found on coolest-birthday-cakes.com.

It seems like every time a birthday rolls around, I end up googling "buttercream." I'm not sure why I haven't saved one yet! ;-) I don't make homemade buttercream frosting too often, mostly only on birthdays.

Anyway, I wanted to share the buttercream recipe I used this year (found on cakecentral), which has been printed out for a keeper recipe! It's the basic shortening and sugar, but perfectly easy and tasty and hard to mess up!

EASY BIRTHDAY BUTTERCREAM

1 cup white all-vegetable shortening
1 cup margarine (or butter)
2 lbs (by weight) confectioners' sugar
6 Tablespoons water
2 teaspoons Wilton clear vanilla extract
2 teaspoons Wilton butter extract/flavor
1 teaspoon almond extract
1/2 teaspoon salt (do not omit!! This is important for flavor development and must be dissolved in liquid)

Mix all liquids together and add salt. Stir to dissolve salt.

Add shortening and margarine to mixer bowl and beat on low speed for 15 seconds. Add half of the sugar and half of the liquid ingredients and mix on medium speed until combined, about 1 minute. Repeat with the remaining sugar and liquids; mix until combined, about 1 minute.

Scrape bowl thoroughly, and mix again, briefly. Don't overbeat your icing, as you don't want air bubbles. Store covered at room temperature. Total mixing time should be under 5 minutes, and never at higher than speeds 3 or 4 on your stand mixture.

Recommend: YES

P.S. If you haven't already, don't forget to enter to WIN an ice cream maker... you can make your own birthday buttercream AND homemade ice cream!! :-)

blog signature

SocialTwist Tell-a-Friend
___________________________________

Tags:

Friday, October 2, 2009

Molly's Apple Brownies

I got this recipe from a college friend who comes from an entire family of fantastic cooks!

These Apple Brownies are different than any other apple "cake" I've had. The tops were crunchy and crackly and the inside was moist and more apple than cake! Molly's Apple Brownies is the perfect recipe to use up those apples you picked!

(Hint: These brownies would be super, duper delicious served still warm with a scoop of vanilla ice cream!!)


MOLLY'S APPLE BROWNIES

1 cup melted butter (I used canola oil)
2 cups sugar
2 eggs
4 large apples, peeled and chopped
1/2 cup nuts (optional)
2 cups flour
1 teaspoon baking powder
1 teaspoon baking soda
2 teaspoons cinnamon (the second time I made these, I also added 1/2 teaspoon of nutmeg...I like cinnamon and nutmeg with apples!)

Beat all ingredients together. Pour into a greased/sprayed 9 x 13" pan. Bake at 350 for about 45 minutes or until toothpick inserted comes out clean. Enjoy!

Recommend: YES

Need some other apple ideas?

Mmmm, try Krista's Fried Apples! She used any leftovers to top waffles for breakfast! YUM!

Mommy's Kitchen used her apples in Paula Deen's Iron Skillet Apple Crisp - and we all know a Paula recipe can't be bad!

And, of course, if you're still wondering what to do with those apples, I'm sure the man in your house wouldn't complain if you turned them into a pie!

blog signature

SocialTwist Tell-a-Friend
___________________________________

Tags:

Wednesday, September 30, 2009

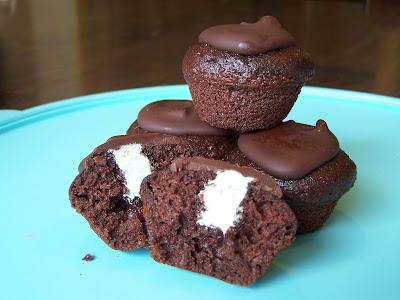
Mini Mint Cream Cupcakes

Besides the dishwasher I received for my birthday, I also got a much-wanted mini muffin pan! Thank you, mom-in-law! :-)

I wanted to christen my mini-muffin pan with something a little out of the ordinary...and, after drooling so much over Rhiannon's Mint Meltaways, I came up with these fun little guys:

Mint Cream Mini Cupcakes
Basically, I used a plain ol' chocolate cake mix and made mini cupcakes. Once the little pretties cooled, I whipped up a simple mint cream filling.

FILLING:
1/2 cup butter or margarine, softened
2 cups confectioners' sugar
1 tablespoon water
1/2 to 1 teaspoon peppermint extract
3 drops green food coloring (if desired)

Beat together all filling ingredients until smooth and creamy.

I put the mint cream filling into a plastic bag fitted with a small cake decorating tip. I shoved the tip into the center of each mini morsel and squeezed just a bit of minty goodness into each one.

I then made up a little chocolate glaze to dollop on the top of each cupcake.

CHOCOLATE GLAZE:
1 1/2 cups semisweet chocolate chips
6 tablespoons butter or margarine, softened

In a microwave safe bowl, combine chocolate chips and butter. Microwave for 60 seconds and stir until melted and smooth.

After spooning a small amount on each tiny cake, I then placed the Mini Mint Cream Cupcakes in the fridge just long enough to set the glaze.

One cake mix filled my 24-cup mini muffin pan and one 12-cup regular muffin pan. The mini muffins were better, in my opinion, because the filling to cake ratio was higher. ;-)

And, because the Mini Mint Cream Cupcakes were sooo good and I could feel myself reaching for another and another and another, I sent them (minus 2 or 3, give or take a few) with my husband to work and left the big cupcakes at home to enjoy.

The Mini Mint Cream Cupcakes were a hit...and, I love my new mini muffin pan!

Recommend: YES

blog signature

SocialTwist Tell-a-Friend
___________________________________

Tags:

Monday, September 14, 2009

Perfect Pumpkin Bars

These were truly perfect.


PERFECT PUMPKIN BARS

3 eggs
1 2/3 cups white sugar
1 cup vegetable oil
2 cups pumpkin puree
2 cups all-purpose flour
1 teaspoons baking powder
1/2 teaspoon baking soda
2 teaspoons ground cinnamon
1/2 teaspoon nutmeg
1/2 teaspoon cloves
1/4 teaspoon ground ginger
1 teaspoon salt

1 tub cream cheese frosting (or make your own!)

Preheat oven to 350 degrees.

In a medium bowl, mix the eggs, sugar, oil, and pumpkin with an electric mixer until light and fluffy. Sift together the flour, baking powder, baking soda, spices, and salt. Stir into the pumpkin mixture until thoroughly combined.

Spread the batter evenly into an ungreased jellyroll pan. Bake for 25 to 30 minutes in preheated oven until toothpick inserted near center comes out clean.

Cool before frosting.

Recommend: YES

blog signature

SocialTwist Tell-a-Friend
___________________________________

Tags:

Wednesday, September 9, 2009

Simple Lemon Pie Filling

This is a super easy Lemon Pie Filling. I like this filling better than homemade, because I can usually taste too much "eggy-ness" in the homemade.

I usually pour this into a baked pie shell, but you'll see in my pictures that I used a square baking dish...and a graham cracker crust. Both ways are delicious! Filling little tart cups or mini cakes would also be YUM! I'm sure you could come up with many great ideas for this filling!

Place 1 package of cook & serve vanilla pudding and 1 package of lemon jello into a small saucepan.

Add 2 1/3 cup of water and 1/3 cup of lemon juice, whisking to combine.


Cook and stir over medium heat until mixture comes to a boil. Cook and stir 1-2 minutes longer or until thickened.


Cool slightly. Pour into desired "pie" vehicle! :-) Place in fridge to cool and set.


Once set, top with cool whip...


Cut, serve, and enjoy! :-)


If you like all things lemon, check out Kim's scrumptious looking Pink Lemonade Cupcakes!

Recommend: YES

blog signature

SocialTwist Tell-a-Friend
___________________________________

Tags:
307728_Coupon Savings - 468x60
Blog Widget by LinkWithin