Showing posts with label holiday recipes. Show all posts

Thursday, March 21, 2013

I Pinned, I Made: Chocolate Peanut Butter Swirl Cookies


Another Pinterest recipe that I couldn't resist trying. And now that I have, I must be the first to tell you that you should try it, too!

You can find the recipe here on Sally's Baking Addiction.


They were soft and chewy and chocolatey and peanut-buttery.

Super yum!

*To cut down on messy hands, I used my cookie scoop to scoop equal amounts of dough next to each other, then did Sally's 'smoosh-and-roll' to get one cookie ball (see below pic). I did chill the dough (which is something I hate doing), and didn't have much trouble with stickiness...so I recommend it!*


You'll definitely need a glass of cold milk with these fabulous Peanut Butter Chocolate Swirl Cookies! I hope you give them a try! (You can thank me later)! ;-)

~~~~~~~~~~~~~~~~~~~~~~~~~~~~~~~~~~~~~~~~~
Looking for more peanut butter and chocolate?? I'd recommend this Black Magic Chocolate Cake topped with this Peanut Butter Cream Cheese Frosting!

blog signature

**DISCLOSURE: Please read my full disclosure policy HERE.**

Thursday, December 20, 2012

I Pinned, I Made: English Toffee


Goodbye, Saltine Toffee!

That's all I've ever made before...and while I always thought it was fabulous, well, that was before.

Before THIS:


Amanda, aka The Taste Tester, is right: you must make it.

It. is. beyond. fabulous.

Yum. Yum. Yum.

I didn't find the process quite as painful as Amanda makes it out to be. ;-) I even made sure I had a stool to sit on, just in case! But, the toffee mixture came together for me in about 20 minutes - using Sam's Club butter and low heat (burner was set on 3.5 out of 10).


I didn't add any nuts (not a fan of most), and the toffee was absolutely delicious to me. Nice and crunchy...smooth and buttery. Mmmmm!

Also, my own personal tip: I use chocolate chips to melt on top AND I make sure it's a mix of milk chocolate and semisweet. In my opinion, it makes the perfect chocolate topping.

Mmmmmm!!!

Need a last minute gift idea?! Head on over to Amanda's for the recipe...and MAKE IT. (Um, you still might need to buy a gift...you just might eat the entire pan yourself instead of sharing)! :-D

blog signature

**DISCLOSURE:Please read my full disclosure policy HERE.**

Sunday, November 11, 2012

A Wreath of Snow by Liz Curtis Higgs


Thanks to WaterBrook Multnomah's Blogging for Books, I was able to read A Wreath of Snow by Liz Curtis Higgs.

ABOUT THE BOOK:
Wrapped in a cloud of steam, the engine rolled to a stop, the screech of metal against metal filling the frosty air. Snow blew across the railway platform and around Meg’s calfskin walking boots. The weather definitely was not improving.

She ordered tea with milk and sugar, eying the currant buns and sweet mincemeat tarts displayed beneath a bell jar.
Later, perhaps, when her appetite returned. At the moment her stomach was twisted into a knot.

“Anything else for you?” the cashier asked as she handed over the tea, steaming and fragrant.

Meg was surprised to find her fingers trembling when she lifted the cup. “All I want is a safe journey home.”

“On a day like this?” the round-faced woman exclaimed. “None but the Almighty can promise you that, lass.”

MY THOUGHTS:
I don’t usually read Christmas-themed books, but A Wreath of Snow's beautiful, wintery front cover and the teaser on the back made my decision!

With her brother’s bitterness overshadowing what should be a joyful time, Meg tries to cut her Christmas visit home short. Unfortunately, snow...and a stranger...change her plans. But secrets are hidden by more than just the not-so-stranger and will make this Christmas one to remember!

A Wreath of Snow is a short, quick read, but full of emotion. The characters struggle within themselves to extend mercy and forgiveness to those around them. With snow, Scottish brogues, and a little curling, A Wreath of Snow is the perfect story for a cozy-up kind of afternoon.

It’s only November, but after closing the book, I was in a Christmas-y mood! If my children had begged to put up the tree, they may have convinced me that day! ;-) Instead, using the recipe that Liz includes in the back of the book, I gathered up some butter, sugar, and flour and whipped up a batch of Scottish Shortbread. Light and buttery: Mmmmm!

1/2 cup confectioners' sugar
1/2 cup cornstarch
1 cup all-purpose flour
3/4 cup butter, softened
1 tablespoon granulated sugar

Sift confectioners' sugar, cornstarch, and flour together in a bowl. Add softened butter, using your hands to knead the mixture into dough. Wrap dough in plastic wrap, and refrigerate for no longer than 30 minutes.

Press cold dough into the bottom of a greased 8x8 pan (round or square; glass is best). Bake at 325 degrees for 30 minutes or until the edges are very lightly browned.

Sprinkle granulated sugar across the top. Cool completely, then cut into 8 servings.


AND FOR YOU, a peek into the book HERE.

Thank you to Liz and Blogging for Books for sending me a copy to read and review!

Also reviewed on Amazon and Christianbook.

blog signature

**DISCLOSURE: I was given a free product in exchange for an honest review. Please read my full disclosure policy HERE.**

Tuesday, March 6, 2012

Pinterest made me! Kiss Pies!


Are you on Pinterest??

Let's just say: fantabulous idea OVERLOAD! ;-)

If you're saying What's Pinterest?! I guess the easiest way to describe it is a visual bookmarking site. Once you find an idea that you love, you 'pin' it to one of your own virtual bulletin boards. You can follow friends or other pinners based on your interests, from food to home decorating ideas to fashion.

I'm a food/recipe follower. Surprised?! ;-)

One of my friends pinned this fun, sweet idea (left) from Picky Palate: Kiss Pies!

I immediately pinned the recipe, knowing I had both pie crusts and kisses in my freezer from my leftover Christmas stash.

I don't enjoy fussy cooking (rolling dough, cutting cookies, pinching dough), but these pretty little pockets were fun. They'd be perfect for a party!

I used regular kisses and sprinkled the tops with cinnamon sugar.

Pin It

I see endless possibilities here. Caramel kisses? Peanut Butter? Miniature Milky Ways?! Nom, nom!!

Follow Me on Pinterest

blog signature

**DISCLOSURE: Please read my full disclosure policy HERE.**

Monday, June 27, 2011

Iced Coffee

My husband is the coffee drinker in our house. I've tried the dark brew many different ways, but just don't like it. I figure if I didn't develop the coffee habit in college, while pulling cramming-for-exam-all-nighters, I never will.

An icy cold Coca-Cola on the other hand...

Anyway... ;-)

Hubby also likes iced coffee, but has never tried making it at home. He says chilled down coffee with ice cubes just isn't the same.

So, when I saw Ree Drummond's (aka Pioneer Woman) recipe for iced coffee, I thought I'd attempt the cold concoction as a surprise for the man I love.

First of all, PW's recipe and instructions were great. However, the proportions (even halved) were just too much for this 1-coffee-drinker household.

It really made a bit of a mess.

The biggest containers I had were

Monday, December 13, 2010

Chocolate Truffle Cookies

Unfortunately for my family, these little morsels won't be on their cookie platters this year.


I think the reason is perfectly understandable.

I can't stop eating them...and they'll be gone by tomorrow. ;-)

So, here's the recipe so they can make their own batch!

CHOCOLATE TRUFFLE COOKIES


1-1/4 cups butter or margarine, softened (I used 1/2 cup margarine and 3/4 cup shortening)
2-1/4 cups confectioners' sugar
1/3 cup baking cocoa
1/4 cup sour cream
1 tablespoon vanilla extract
2-1/4 cups flour
2 cups (12 oz) semisweet chocolate chips
1/4 cup chocolate sprinkles

In a large mixing bowl, cream butter, sugar, and cocoa until light and fluffy. Beat in sour cream and vanilla. Add flour; mix well. Stir in chocolate chips. Refrigerate for 1 hour. Shape into 1-inch balls; dip tops in chocolate sprinkles. Place, sprinkled side up, 2 inches apart on ungreased baking sheets. Bake at 325 degrees for 10 minutes or until set. Cool for 5 minutes before removing to wire racks to cool completely. Yield: about 5-1/2 dozen.

Recommend: YES

blog signature
___________________________________

Friday, November 5, 2010

It's that time again!!

Just take a walk through your local grocery store, and you'll see that all of the holiday baking supplies are prominently displayed.

Well, time to make some hot cocoa, pull up your stools, and start jotting down some gotta-make-this-year recipes!

Start with this one! It REALLY is the yummiest, creamiest hot chocolate! The mix fills a large gallon sized bag (approximately 50 servings) and, although we seemed to drink it all the time, it lasted my husband and me months!

GOURMET HOT COCOA MIX
Tammy Maltby from The Christmas Kitchen


4 cups instant nonfat dry milk powder
2 cups sifted confectioners' sugar
2 cups French vanilla powdered nondairy coffee creamer
2 cups powdered chocolate milk mix (store brand works just fine)
1 5-oz (6 serving) package cook-and-serve (not instant) chocolate pudding mix
1/4 cup unsweetened cocoa powder (I ended up using 1/2 cup. Gave it just the right chocolate level I was looking for)
2 cups miniature marshmallows and/or miniature chocolate chips (optional, but yummy)

Boiling water or milk, for serving

Combine all ingredients in a bowl and stir well. For a better blend, mix the dry ingredients in a blender or food processor before adding the marshmallows. Store the mix in an air-tight container. Makes about 12 1/2 cups mix, for 50 servings.

To serve, place 1/4 cup mix (or more) in mug or cup. Add 3/4 cup boiling water or hot milk and stir well.

Once you've done that, check out my other holiday recipes!

Recommend: YES

blog signature
**Disclaimer: Post *may* contain affiliate links.**
___________________________________

Monday, February 1, 2010

POM Wonderful 100% Pomegranate Juice

Know what this is?

pomegranate
A pomegranate!

I must admit, I've never eaten a pomegranate before! But, now, thanks Kristen to from POM Wonderful, I've had a chance to taste this:
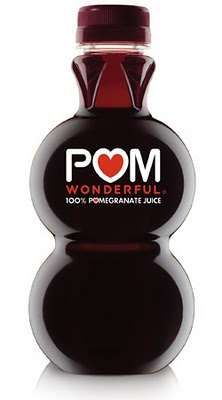
POM Wonderful pomegranate juice
100% pomegranate juice!

(You should see the bottle in person...it's so little and cute!) :-)

And, the pomegranate juice was very good! To me, it tasted like a cran-raspberry juice, only not as tart.

And not only does POM Wonderful's pomegranate juice TASTE delicious, but it's GOOD for you, too!

POM Wonderful's 100% pomegranate juice is full of antioxidants and is excellent for heart and prostate health! You can read more about all of the health benefits of POM Wonderful's pomegranates and juice HERE!

I couldn't wait to see what else I could do with pomegranate juice! I'm sharing two recipes that I decided to try, using 100% USA California grown pomegranate juice!

I decided to make some Pomegranate Sorbet and a Pomegranate Lemonade Spritzer.

The Pomegranate sorbet was based on a recipe by Giada de Laurentis. Her recipe used a mint-infused simple syrup and chocolate chips. Mine is sans chocolate, and I added orange peel instead of mint leaves to the syrup.


I shouldn't have used the orange peel! It overpowered the initial taste, but the lingering flavor of the sorbet WAS really good. When (notice I didn't say "if") I make this sorbet again, I will use a plain simple syrup... and the results will be perfect!

The sorbet is super simple! It only takes only 4 ingredients: sugar, water, orange juice and POM Wonderful pomegranate juice and would make a perfect summer dessert!

POMEGRANATE SORBET

1 cup sugar
1/2 cup water
2 cups 100 percent POM Wonderful pomegranate juice
1 cup orange juice

In a small saucepan, combine the sugar, water, and mint leaves over medium heat. Bring to a boil, reduce heat, and simmer for 5 minutes, stirring occasionally, until the sugar has dissolved. Remove the pan from the heat and allow the syrup to cool for 20 minutes.

In a 4+ cup measuring cup or large pitcher, combine the Simple Syrup, pomegranate juice, and orange juice. Pour the pomegranate mixture in an ice cream maker and freeze according to the manufacturer's instructions.

Scoop the sorbet into dessert bowls.

(OH...you don't have an ice cream maker??? That's too bad...

BUUUTTT... you just wait!! I've got a SURPRISE for you later this week!! wink, wink!! Stay tuned!) ;-)

I also made a Pomegranate Lemonade Spritzer...and this was really tasty!


This refreshing drink looked really pretty, too, and would be a great drink for a brunch or bridal shower. If you don't want to make the lemon syrup, straight pomegranate juice topped with a little seltzer water would be just as yummy!

POMEGRANATE LEMONADE SPRITZER
1 1/2 cups POM Wonderful pomegranate juice
1 cup freshly squeezed lemon juice, plus lemon wheels for garnish
1/2 cup sugar
Seltzer water, for mixing

Pour the pomegranate juice into an ice cube tray and freeze overnight. Put the lemon juice and sugar in a small saucepan and bring to a simmer; cook, stirring, until sugar is completely dissolved. Cool to room temperature.

To serve, fill a tall glass with 3 to 4 pomegranate ice cubes. Pour about 1/4 cup of the lemon syrup over the ice and top off with seltzer. Repeat with the remaining ingredients. Stir gently, garnish each glass with a lemon wheel and serve.

For me, the spritzer was my favorite! I try not to drink too much soda...but, sometimes, I really want that "peppy" sweetness. Pomegranate juice with seltzer (with or without the lemon syrup) gives me a healthier option to sugar-filled soda. Refreshing, sweet, and bubbly! YUM.

You can find many more delicious recipes using pomegranate juice on POM Wonderful's site HERE.

POM Wonderful also bottles other delicious juices, like blueberry, cherry, and kiwi! I will be putting pomegranate juice on my regular grocery list and hope you'll look around to see what POM Wonderful products your grocery store carries! I think you'll be surprised at all you can do with it!

Recommend: YES

blog signature

SocialTwist Tell-a-Friend

**Disclaimer: I was given a free product for review purposes only. My reviews are not monetarily compensated and have not been influenced by the sponsor in any way, unless otherwise disclosed. Each review is based on the reactions and opinions of myself and/or family.**
___________________________________

Tags:

Wednesday, December 23, 2009

Saltine Toffee


This recipe is so very quick and easy...and impressive!

A super delicious toffee that begins with, yep, saltine crackers! I've made this for several Christmases and my family gobbles it up!

Now, if you've got picky people on your list, you may want to tell them about the crackers AFTER they've declared how yummy the candy is. Although, I don't think saltines are that strange... they're mostly flour, salt, and water, right?

If you're looking for something last-minute to take to that Christmas Party, whip up a batch of this Saltine Toffee!


Preheat your oven to 400 degrees. Begin by lining a jelly roll pan with foil. Place one layer of saltines in the pan (usually 1 sleeve of crackers, although my sleeve was 1 short this year! I had to open a second sleeve for just ONE cracker!) :-)


Next, melt together 1 cup of butter (NO substitutes) and 1 cup of brown sugar over medium heat, stirring frequently.


Once mixture comes to a boil, boil for 3 minutes.


Immediately, pour carefully over the crackers. Bake in oven for 5-6 minutes.


Remove from oven. Toffee mixture should have spread to cover all of your crackers (don't worry if a spot or two isn't covered, though)!


Sprinkle with 2 cups of semisweet chocolate chips (this year, I used a mixture of milk and semisweet). Let sit for 5 minutes.


Carefully spread softened chocolate and sprinkle with nuts, if desired (I like to use sliced almonds; some people omit the nuts and drizzle with white chocolate).


Chill in fridge, about 30 minutes, then break into pieces and impress your guests! Yum yummy!


Recommend: YES

blog signature

SocialTwist Tell-a-Friend

___________________________________

Tags:

Tuesday, December 22, 2009

Chocolate Caramel Candy - Snickers Cheat!


I found this recipe a few weeks ago on Allrecipes, and since I had all of the ingredients on hand, I decided to give it a try.

All I can say is: FANTABULOUS!!! If you like Snickers, you'll love these. Not exactly the same, but very similar. YUMMM!

Although simple, the recipe does take a little time - mostly just waiting between layers. As each layer chilled, I washed the bowls to use again for the next step. This Chocolate Caramel Candy will definitely be included in my future Christmas platters! I sent a plate of various candies to work with my husband, and these were the thumbs up favorite.

chocolate caramel candy
CHOCOLATE CARAMEL CANDY

1 cup milk chocolate chips (I used semisweet)
1/4 cup butterscotch chips
1/4 cup creamy peanut butter

1/4 cup butter
1 cup white sugar
1/4 cup evaporated milk
1 1/2 cups marshmallow creme
1/4 cup creamy peanut butter
1 teaspoon vanilla extract
1 1/2 cups chopped salted peanuts

1 (14 ounce) package caramels
1/4 cup heavy whipping cream (I used evaporated milk, since I'd already opened the can for the previous step)

1 cup milk chocolate chips (I used semisweet)
1/4 cup butterscotch chips
1/4 cup creamy peanut butter

Lightly grease one 13 x 9 inch pan.

To Make Base: Combine 1 cup milk chocolate chips, 1/4 cup butterscotch chips and 1/4 cup creamy peanut butter in a small saucepan. Cook, stirring constantly, over low heat until melted and smooth. Spread into the bottom of the prepared pan. Refrigerate until set.

To Make Filling: In a heavy saucepan melt the butter over medium-high heat. Stir in sugar and evaporated milk. Bring mixture to a boil and stir for 5 minutes. Remove from heat and stir in the marshmallow cream, 1/4 cup of the peanut butter, and the vanilla. Add the peanuts, and spread over the base layer. Refrigerate until set.

To Make Caramel Layer: Combine the caramels and cream in a saucepan, stir over low heat until melted and smooth. Spread over the top of the filling and refrigerate.

To Make Frosting Layer: In another saucepan combine 1 cup milk chocolate chips, 1/4 butterscotch chips and 1/4 cup peanut butter, and stir over low heat until melted and smooth. Pour over the caramel layer. Refrigerate for at least 1 hour. Cut into 1 inch squares. Store in the refrigerator.

Recommend: YES

blog signature

SocialTwist Tell-a-Friend

___________________________________

Tags:

Saturday, December 19, 2009

The. Best. Fudge. EVER.


Really. It is.

I am soo glad for the lady who gave me this fudge recipe at one of my bridal showers! I have made it every Christmas since. The smoothest, creamiest fudge I've ever had. And...YUMMMMMM is all I can say about it!

(Although, every year, when I give my husband a piece to test taste, he grimaces as he's eating it it. It's his way of saying, "Oh, it's bad. I wouldn't give it as gifts. You should keep the whole pan here at home for me!" Sorry for him, the WHOLE pan never stays, but there always seems to be plenty of fudge both for gifts and us)! ;-)


CHRISTMAS FUDGE

1 lb grated milk chocolate (I only use Symphony bars! And, I use a vegetable peeler to "grate." It seems to be the easiest method I've discovered over the years)
12 oz package semisweet chocolate chips
1 jar marshmallow fluff (the original recipe never specified a size - I just use a normal jar, 7-10 oz)
1 stick margarine or butter
4 1/2 cups sugar
1 can (12 oz) evaporated milk
pinch of salt (I omit)

Place grated milk chocolate, chocolate chips, and fluff in large bowl. In large saucepan, combine margarine, sugar, evaporated milk, and salt. Cook over low heat, stirring constantly, until mixture comes to a boil. Boil for 5 minutes, stirring occasionally. Slowly pour cooked mixture into chocolate mixture, stirring well. When well blended, add 2 cups chopped walnuts (optional for you....absolutely omitted for me!). Pour into a greased jelly roll pan and chill. Cut when firm. (I like to line the pan with foil and then waxed paper, so that once chilled, I can lift out of the pan and cut easier).

Recommend: YES

blog signature

SocialTwist Tell-a-Friend

___________________________________

Tags:

Friday, December 18, 2009

Grandma's Buckeyes (aka Peanut Butter Balls)


Some of my favorite memories as a little girl are the times I spent with my grandma, learning how to cook!

One year, she asked me to copy her favorite recipes into little books she'd bought to give to her grandchildren for Christmas. I spent months writing - years before the internet made printing books yourself easy! I cherish that little book, not just for Grandma's recipes, but for all of the memories those dishes she made with love bring back.

Grandma always had a plate of these Buckeyes sitting out during her Christmas Eve party. I haven't made them in several years, but they turned out perfectly and tasted just as yummy as I remember Grandma's candy!

buckeyes aka peanut butter balls
GRANDMA'S BUCKEYE CANDY

1 lb smooth peanut butter
1 1/2 lbs powdered sugar
2 sticks butter or margarine, melted
8 oz. semisweet chocolate chips or Baker's German Sweet Chocolate
1/4 slab paraffin wax (I've never bought this...for every 8 oz of chocolate, I add 2 tablespoons of shortening)

Mix first three ingredients together, and roll into 1-inch balls. Place in refrigerator overnight (I just chill for an hour or so). The next day, melt chocolate with paraffin in double boiler (I used my mini crockpot this year...perfect!). Using a toothpick, dip each ball into chocolate, leaving a small circle to look like a buckeye (which is similar to a horse chestnut, I believe).

Place on waxed paper and let harden.

Recommend: YES

blog signature

SocialTwist Tell-a-Friend

___________________________________

Tags:

Monday, December 14, 2009

Italian Sprinkle Cookies


I decided to try a new cookie recipe this year, from my small, well worn Taste of Home "Cookies for Christmas" book. The submitter said that Italian Sprinkle Cookies "take a little time -- but...are well worth it!"

I find they took MUCH less time than cut-out cookies, and (to me) just as tasty! I did change some of the extract flavorings and added nutmeg for that "Christmas-y" flavor. I'd say Italian Sprinkle Cookies are a keeper!


ITALIAN SPRINKLE COOKIES

6 eggs
5 cups all-purpose flour
2 cups confectioners' sugar
2 tablespoons plus 1 1/2 teaspoons baking powder
1 cup vegetable oil
1 tablespoon almond extract (I used vanilla)
1 1/2 teaspoons lemon extract (I used Wilton's butter flavoring)
(I also added 1/2 teaspoon nutmeg)

GLAZE: (I would recommend doubling this)
1/2 cup warm milk
1 teaspoon almond extract (I used vanilla)
1 teaspoon vanilla extract
3 3/4 cups confectioners' sugar

Colored sprinkles

In a mixing bowl, beat eggs until light and foamy, about 5 minutes. Set aside. In another mixing bowl, combine flour, sugar and baking powder (and nutmeg if using); stir in oil and extracts. Gradually add eggs (dough will be stiff). Roll dough into 1-inch balls (I used a small cookie scoop). Place on ungreased baking sheets. Bake at 350 degrees for 12 minutes or until edges begin to brown.

For glaze, combine milk and extracts in a large bowl. Add sugar; whisk until the glaze is smooth. As soon as cookies are removed from the oven, quickly immerse two or three at a time into the glaze. Remove with a slotted spoon or fingers. Place cookies on wire racks to drain. Quickly top with sprinkles. Let dry 24 hours before storing in airtight container.

Yield: about 7 dozen.

Recommend: YES

blog signature

SocialTwist Tell-a-Friend
___________________________________

307728_Coupon Savings - 468x60
Blog Widget by LinkWithin
