Showing posts with label bread. Show all posts

Wednesday, March 18, 2015

Best Ever Honey Whole Wheat Bread!


I have been making this bread for over 3 years...and have been meaning to blog about it for just about that long! It took several months to gradually adjust a recipe I found until I was satisfied with the results: a soft, light-tasting, no-white-flour, all whole wheat bread.


I have found that I prefer this bread to have a short stay in the freezer before cutting, seems to tenderize the crust even more. As this is the only bread we now eat (no more store stuff!), the freezer time isn't a problem. I make a batch or two a week, always being sure to have a loaf or two or more in the freezer!

Because I make this bread so often, I mix up the flour and gluten beforehand and place in quart bags. This helps evenly distribute the gluten throughout the flour – if you don't, you can end up with gluey glops in your bread. Ick. This also cuts down my preparation time (I've got my recipe memorized), and I can quickly grab a bag and put a batch together in my bread machine in the morning.


And, this bread really must have the gluten. Gluten helps keep whole wheat bread soft and tender. Make this bread without, and you'll notice the difference!!

BEST EVER HONEY WHOLE WHEAT BREAD

In bread machine place:
1-1/3 cups warm milk
½ teaspoon salt
3 tablespoons canola (or olive) oil
1/3 cup honey
1 egg, lightly beaten

Thoroughly combine and add:
3-3/4 cups whole wheat flour (I've used every brand and found that Gold Medal has the best results!)
3 tablespoons gluten (find this in the baking aisle – I use Bob's Red Mill)

Make a small well in flour and place:
1-1/4 teaspoons yeast

Choose your bread machine's dough setting. When cycle is complete, turn dough out onto a greased or floured surface (I use a cookie sheet lightly sprayed with cooking spray – keeps my countertop clean, too)! Divide dough in half. Press one half into a rough rectangle (see pictures) and roll tightly towards you. Pinch and turn ends under. Place dough in greased loaf pan. Repeat with other half of dough.
Cover bread with cloth and let rise in a warm place until edges just begin to round the edge of the pan (this can take anywhere from 1-3 hours, depending on the temperature and humidity of your house, the season, etc).

Once dough has risen, you can brush the top with a light egg wash (1 egg, beaten with 1 tsp of water), if desired (I don't even bother with this step anymore)! Bake in a preheated 350 degree oven for 25 minutes. Let cool in pan for 15 minutes before turning out onto a rack to cool completely.

When cool, package and freeze...or slice and eat.

Best whole wheat toast and sandwich bread...ever!! Ever.


blog signature

**DISCLOSURE: Please read my full disclosure policy HERE.**

Wednesday, October 24, 2012

Blueberry Muffins from The New Best Recipe


I've posted about blueberry muffins in the past HERE. 'To Die For' they were called. Mmm, yes, they were.

UNTIL I made the Blueberry Muffins from The New Best Recipe.


(Don't have that cookbook on your shelf yet?! You must. Besides tested and tried dishes, The New Best Recipe has illustrated kitchen tutorials and unbiased product ratings from America's Test Kitchen and it is over 1000 pages of ahh.maz.ing-ness)!


Ok, back to the muffins.


The New Best Recipe Blueberry Muffins should be called 'to die for' or 'the best' or something!

The added sour cream in NBR's recipe takes the cake...or muffin. The sour cream compliments the blueberries perfectly, making a most fabulous tasting muffin.

You must try them!

And, if you have the ingredients around to make the Lemon-Glaze following the recipe...oh, do! That puts these muffins over the top!

(When I don't have those ingredients, I use NBR's other topping variation: Cinnamon Sugar-Dipped OR I brush the muffin tops with a vanilla syrup [like DaVinci's coffee syrups] and sprinkle with turbinado sugar).

Oh, my mouth is watering! Time to share the recipe!

BLUEBERRY MUFFINS
from The New Best Recipe via acookingbookworm.com

2 cups (10 oz) unbleached all-purpose flour
1 tablespoon baking powder
1/2 teaspoon salt
1 large egg
1 cup (7 oz) sugar
4 tablespoons (1/2 stick) unsalted butter, melted and cooled slightly
1-1/4 cups (10 oz) sour cream
1-1/2 cups (7-1/2 to 8 oz) frozen or fresh blueberries

Preheat oven to 350 degrees. Grease a standard 12-cup muffin tin and set aside.

Whisk the flour, baking powder, and salt in a medium bowl until combined. Whisk the egg in a second medium bowl until well combined and light-colored, about 20 seconds. Add the sugar and whisk vigorously until thick and homogenous, about 30 seconds; add the melted butter in 2 or 3 additions, whisking to combine after each addition. Add the sour cream in 2 additions, whisking just to combine.

Add the berries to the dry ingredients and gently toss just to combine. Add the sour cream mixture and fold with a rubber spatula until the batter comes together and the berries are evenly distributed, 25 to 30 seconds (small spots of flour may remain, and the batter will be thick. Do not overmix).

Using a large spoon sprayed with nonstick cooking spray to prevent sticking, divide the batter among the greased muffin cups. Bake until the muffins are light golden brown and a toothpick or skewer inserted into the center of a muffin comes out clean, 25 to 30 minutes, rotating the pan from front to back halfway through the baking time. Invert the muffins onto a wire rack, stand the muffins upright, and cool 5 minutes.

Ginger- or Lemon- Glazed Blueberry Topping
While the muffins are baking, mix 1 teaspoon grated fresh ginger or grated lemon zest and 1/2 cup sugar in a small bowl. Bring 1/4 cup lemon juice and 1/4 cup sugar to a simmer in a small saucepan over medium heat; stir to dissolve the sugar and simmer until the mixture is thick and syrupy and reduced to about 1/4 cup. After the baked muffins have cooled 5 minutes, brush the tips with glaze; then, working one at a time, dip the tops in lemon sugar or ginger sugar. Set the muffins upright on a wire rack; serve.


blog signature

**DISCLOSURE: Please read my full disclosure policy HERE.**

Tuesday, January 31, 2012

Craving Donuts?? Try these!


Did you miss this recipe the first time around??

I'm craving donuts today, so I thought I'd better share these delicious Doughnut (Hole) Muffins with you again!

They're (almost) healthy! Well, at least healthier than something you could pick up at the DD drive-thru and, in my opinion, better tasting!!

They're quick and easy, too! So, go get the recipe HERE!

blog signature

**Disclaimer: Post *may* contain affiliate links.**

Monday, January 30, 2012

Bread Machine Bagels


Homemade bagels? Really? Yes!

Bagels really aren't any more difficult to make than dinner rolls, especially when you've got a bread machine! Bagels just have the extra step of boiling in water before baking which helps gives them their trademark chewy crust.


Our favorite way to make these is to add 2-3 teaspoons of onion powder into the dry ingredients and then, just before baking, brush the shaped tops with an egg white and minced dried onion (that you rehydrate in just a bit of water). Mmmm!

So, are you ready to start?

Monday, April 4, 2011

Em's French Bread

A couple of weeks ago, a friend of mine shared her French Bread recipe with me.

I loved it so much, I've already made it 3 times...and can't wait to make another batch! I've used all-purpose flour twice and bread flour once.

Both ways achieve perfect results.


If I was going to serve the bread alongside spaghetti or chili, I'd likely use all-purpose flour which provides a slightly softer crust and texture.

If I'm planning meatball subs or make-your-own sub night, I'd use bread flour. Bread flour gives a crunchier crust and chewier bread texture, resulting in a roll that would hold up better loaded with meat and cheese.

But, either way, your family will be impressed when you pull these golden loaves out of the oven! So dust off that bread machine and let's get started!

EM'S FRENCH BREAD
(for 2-lbs dough - 4 loaves, about the length of a cookie sheet)

1-2/3 cup water (80 degrees)
1-1/2 teaspoons salt
1 tablespoon oil (I use canola)
2-1/2 teaspoons sugar
5 cups bread flour (all-purpose will work too)
1 tablespoon active dry yeast

Place into bread machine according to manufacturer's instructions. Choose dough cycle.

When cycle is complete, turn dough onto work surface (I lightly spray some wax paper with cooking spray). Divide dough into 4 equal sections (you don't have to shape into balls...I just did for the picture):


Roll (or press) into rectangles (15x8). (I spray a cookie sheet and press my dough into shape there. Helps me keep a 'rectangle' visual and saves the mess on my countertop)!

Roll up dough, keeping seam side down. Press and seal ends:


Place on greased cookie sheets (or baking stone), lightly sprinkled with cornmeal. To impress your friends, make three slashes in the dough with a sharp knife.

*At this point, you can flash-freeze your loaves (keep on greased cookie sheet and place in freezer. Once frozen, place in freezer bags). Just take out a frozen loaf and allow a few hours for the dough to thaw and rise. Then, bake!*

Cover and let rise in a warm, draft-free place for about an hour or until doubled. Brush loaves with an egg wash (one egg, beaten with 1 tablespoon of water).

Bake in a 375 degree oven for 25-30 minutes or until golden brown and loaf sounds hollow when tapped.


Slice. Slather with butter. Eat. Sigh. Be happy that the recipe makes more than 1 loaf. ;-)


Thanks, Em! DELISH.

Recommend: YES
blog signature

**Disclaimer: Each review is based on the reactions and opinions of myself and/or family. Post *may* contain affiliate links.** ___________________________________

Friday, September 10, 2010

To Die For Blueberry Muffins

Oh, these were!

Fantastic!

Yum!
Frozen blueberries can be used, but let me tell you: FRESH makes these FABULOUS!


Yum, yum, yummy!

Denser than most homemade muffins I've made, these sweet-tart muffins with their crumbly streusel topping, made me feel like I had bought a special bakery treat!

TO DIE FOR BLUEBERRY MUFFINS

1-1/2 cups all-purpose flour
3/4 cup white sugar
1/2 teaspoon salt
2 teaspoons baking powder
1/3 cup vegetable oil
1 egg
1/3 cup milk
1 cup fresh blueberries
1/2 cup brown sugar
1/3 cup all-purpose flour
1/4 cup butter or margarine, cubed
1-1/2 teaspoons ground cinnamon

Preheat oven to 400 degrees. Grease muffin cups or line with muffin liners

Combine 1-1/2 cups flour, white sugar, salt, and baking powder. Place vegetable oil into a 1 cup measuring; add the egg and enough milk to fill the cup. Mix this with the flour mixture. Fold in blueberries. Fill muffin cups 3/4 full.

For crumb topping: with fork, mix together brown sugar, 1/3 cup flour, 1/4 cup butter, and 1-1/2 teaspoons of cinnamon until crumbly. Sprinkle over muffin batter before baking.

Bake muffins in preheated oven for 20-25 minutes, or until done.

Recommend: YES
blog signature
**Disclaimer: Each review is based on the reactions and opinions of myself and/or family. Post *may* contain affiliate links. If you click on them and decide to make a purchase, I receive a (very!) small commission. Hey, every little bit helps! So, I thank you! :-).** ___________________________________

Wednesday, July 28, 2010

POM Wonderful Pomegranate Jelly

My June/July Taste of Home issue arrived, and I couldn't wait to make one of the recipes I saw: Pomegranate Jelly!

I thought the POM Wonderful pomegranate sorbet I made was pretty tasty.

My husband LOVES POM Wonderful pomegranate juice in his iced tea (especially if I brew a raspberry tea)!

But, this Pomegranate Jelly is, by far, MY favorite use of POM Wonderful's pomegranate juice!

And, sooo easy! No canning involved!

Well, the original recipe called for canning...but, I made freezer jam... easy peasy!

There's something so beautifully satisfying about a row of freshly filled canning jars (or plastic freezer jam jars)! ;-)


Ok, here's the recipe!

POMEGRANATE JELLY

3-1/2 cups POM Wonderful pomegranate juice
1 Tablespoon lemon juice
1 pkg (1-3/4 oz) powdered fruit pectin
5 cups sugar

In a dutch oven, combine POM Wonderful pomegranate juice, lemon juice, and pectin. Bring to a full rolling boil over high heat, stirring constantly. Stir in sugar; return to a full rolling boil. Boil for 2 minutes, stirring constantly.

Remove from the heat; skim off foam. Ladle hot liquid into clean freezer containers and cool to room temperature.

Let stand for 24 hours. Refrigerate for up to 3 weeks or freeze up to 12 months.


Now, to get the full delicious effect of your homemade pomegranate jelly, you MUST bake up a loaf of this fantastic Amish White Bread.

While the bread is slightly warm, slather with plenty of fresh butter and your delicious homemade jelly. Take a bite.

Try not to gasp and drool.

That'll make a very sticky mess.

Now (after you've polished off another slice), get super excited over how easy it was to make pomegranate jelly and think of all of the possibilities! POM Wonderful also makes other delicious 100% juices that could easily be swapped out in this recipe.

How about POM Wonderful blueberry juice?! Or mango? Or cherry?? Oh...I hope freezer jars are still in stock! :-D

Recommend: Oh yummy, YES!

Many thanks to POM Wonderful for sending me a pomegranate care package to try out some summery recipes!

blog signature

**Disclaimer: I was given a free product for review purposes only. My reviews are not monetarily compensated and have not been influenced by the sponsor in any way, unless otherwise disclosed. Each review is based on the reactions and opinions of myself and/or family. Post *may* contain affiliate links. If you click on them and decide to make a purchase, I receive a (very!) small commission. Hey, every little bit helps! So, I thank you! :-)**

___________________________________

Wednesday, May 5, 2010

Amish White Bread

This Amish White Bread is the perfect 'everyday' homemade bread.


The crust is nice and soft. The inside is light and tender, yet sturdy enough to cut into thin slices for hearty sandwiches.

I prefer to use my bread machine's dough setting and then put this slightly sweet loaf in my oven, but you can bake it right in your machine.


Here's the recipe as I made it (if you want the original version, click HERE):

AMISH WHITE BREAD

3/4 cup warm milk
1/4 cup warm water
1/2 teaspoon salt
1/4 cup canola oil
2-3/4 cups bread flour (I use all-purpose)
1/4 cup white sugar
1 teaspoon active dry yeast

Place ingredients in bread machine in order suggested by manufacturer. Select dough cycle. When cycle is complete, remove dough from machine and place into a greased loaf pan. Cover and let rise until dough is one inch over top of pan, about 1 hour.

Just prior to baking, brush loaf with an egg wash (1 egg, beaten with 1 tablespoon of water).

Bake at 350 degrees for 30 minutes or until loaf sounds hollow when tapped.

Cool on wire rack for 20 minutes before removing from pan.

Recommend: YES

blog signature
SocialTwist Tell-a-Friend
___________________________________
Tags:

Friday, February 26, 2010

Italian Bread

This is my go-to bread recipe whenever we have Italian night - spaghetti, lasagna, etc. I rarely, if ever, buy store bought Italian loaves anymore.

I split the dough and bake two loaves, freezing the extra one. When I want the frozen one, I thaw, wrap in foil, and warm in the oven - just like freshly baked. Mmmm!


(I forgot to take a picture of the beautifully browned baked loaf...!)


ITALIAN BREAD USING A BREAD MACHINE

4 cups unbleached all-purpose flour
1 tablespoon light brown sugar
1 1/3 cups warm water (110 degrees F)
1 1/2 teaspoons salt
1 1/2 teaspoons olive oil
1 (.25 ounce) package active dry yeast (2 1/2 teaspoons)

1 egg
1 tablespoon water
2 tablespoons cornmeal

Place flour, brown sugar, warm water, salt, olive oil and yeast in the pan of the bread machine in the order recommended by the manufacturer. Select dough cycle; press Start.

Deflate the dough and turn it out onto a lightly floured surface. Form dough into two loaves. Place the loaves seam side down on a cutting board generously sprinkled with cornmeal. Cover the loaves with a damp cloth and let rise, until doubled in volume about 40 minutes. Meanwhile, preheat oven to 375 degrees F.

In a small bowl, beat together egg and 1 tablespoon water. Brush the risen loaves with egg mixture. Make a single long, quick cut down the center of the loaves with a sharp knife. Gently shake the cutting board to make sure that the loaves are not sticking. If they stick, use a spatula or pastry knife to loosen. Slide the loaves onto a baking sheet with one quick but careful motion. (I shape my loaves and let them rise directly on my baking stone)

Bake in preheated oven for 30 to 35 minutes, or until loaves sound hollow when tapped on the bottom.

Recommend: YES

blog signature

SocialTwist Tell-a-Friend

___________________________________

Tags:

Saturday, January 9, 2010

World's Easiest Crusty Bread - No Kneading Required!

If you can dump some flour, water, yeast, and salt into a bowl and give it a quick stir...you can make this bread. Soooo easy! NO KNEADING!!! And, it turns out a wonderfully, delicious crusty bread that we gobbled up (with lots of butter)! ;-)

The only thing this bread needs is time...and, a little planning if you want it for a specific meal. I planned on it for lunchtime with some turkey soup. So, I mixed the dough together about 4:30 the afternoon before.

no knead bread

I had read about this recipe (also called "No Knead Crusty Bread") almost a year ago, but the directions used a cast iron pot to bake in. Since I didn't have one, I just saved the recipe for "someday."

THEN... I saw that Tina, over at Mommy's Kitchen, baked her bread in a covered pyrex bowl!

So, I got out my round covered Corelle casserole dish and made the bread. YUM. YUM. YUM!!!

Really, you've got to try it!! You won't be disappointed!

Tina's got a great step-by-step over on her blog! Go. GO. GO!

Recommend: OH YUMMY YES

blog signature

SocialTwist Tell-a-Friend
___________________________________

Tags:

Saturday, December 26, 2009

Christmas Breakfast!

Ohh, yummy Christmas breakfast!! I made this dough in the bread machine and prepared the cinnamon buns on Christmas Eve night. I placed the pan in the fridge overnight and baked them the next morning. I frosted them with (storebought) cream cheese frosting.


Oh, man...were they GOOOD!!! :-)


(I used the full amount of dough this time. Perfectly BIG and flaky. Mmmm!)

Before eating those warm, gooey rolls, I opened a nice knife set from my husband!! All I asked for was a new paring knife!! I've never had nice knives....I'm not quite sure how to use things that really cut! lol!

Today, I'm enjoying a relaxing day after Christmas, just watching my kids play with all of their new toys. I wasn't planning on taking down the tree until next week, but I'm feeling awfully motivated at the moment! Naptime for the kids is quickly approaching, and the big green giant may be gone by the time they wake up.

I hope you all had a wonderful Christmas with your families!

Recommend: YES

blog signature

SocialTwist Tell-a-Friend

Saturday, November 14, 2009

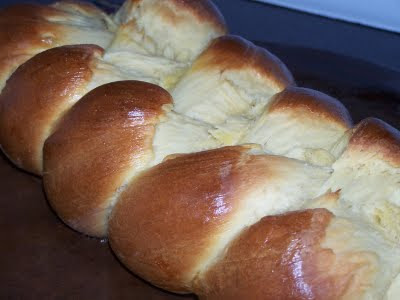
A Number One Egg Bread

For awhile, I was getting fresh eggs from a friend and trying to find recipes to use up all of the eggs I was getting!

I tried this bread recipe and it was fantastic! When toasted, it reminded me of a croissant! And, it would make excellent french toast (we never had enough leftover to try it)!

egg bread
A NUMBER ONE EGG BREAD

2 (.25 ounce) packages active dry yeast (or 2 Tablespoons bread yeast)
2/3 cup warm water
6 egg yolks
3 eggs, room temperature
1/2 cup vegetable oil
1/4 cup white sugar
1 teaspoon salt
4 1/2 cups all-purpose flour
*****************
1 egg
1 tablespoon water

Place first 8 ingredients in bread machine in order recommended by manufacturer. Select dough setting.

When cycle is complete, turn dough out onto lightly floured surface. Divide dough into 3 pieces. Roll each piece into a rope about 12 inches long. Braid the three strands together, and seal the ends. Place the bread on a greased cookie sheet. Beat the remaining 1 egg with water; brush onto bread. Let the bread rise until doubled, about 45 minutes.

Preheat the oven to 375 degrees F (190 degrees C). Brush the bread with eggwash again.

Bake for 40 minutes, or until golden. Cool on a wire rack.

Recommend: YES

blog signature

SocialTwist Tell-a-Friend

___________________________________

Tags:

Thursday, October 29, 2009

Creamy Chicken Gravy and Fluffy Biscuits

This Juicy Rotisserie Style Chicken is truly the best I've ever had. I made this last weekend and tripled the spice mixture to keep on hand in an extra spice jar I had. I've made this Rotisserie Chicken several times before, but my husband still kept raving about it...even 2 days later!

I'm already planning on using the same technique for this year's Thanksgiving turkey!

rotisserie chickenWhenever I cook a whole chicken, I always have plans for the leftovers. Sometimes I make buffalo chicken wraps...YUM! Sometimes, the chicken ends up on a chicken cordon bleu pizza... mmmmmm!

But, this weekend's cluck-cluck was headed for a swim in some rich creamy gravy!

(I'm afraid I don't use a recipe, so don't have one to share. I saute celery and onions in butter until tender. Then, add some flour and spices to make a roux. Then, I whisk in mostly chicken broth and a splash of milk and bring to a boil to thicken).

Then, I made a double batch of Fluffy Biscuits:

fluffy biscuits
The warm, flaky biscuit was then split in half and drenched in creamy, chicken-y goodness. Ahhh, comfort food! Yum!

chicken and biscuits
We've had evangelistic meetings at our church this week, so I haven't taken much time to post. I have been taking time, however, to tidy up my blog here and there. So far, I'm pretty pleased with the tweaking that's going on... someday I'll like the look well enough to stop arranging and rearranging!

What do you like/dislike about the new look? What would you like to see? I'm always happy with constructive feedback!

I should be back to a more regular posting schedule by next week! I'm excited for Saturday's meal! I'm making Mommy's Kitchen's No Peek Beef Tips...they sound fabulous!

blog signature

SocialTwist Tell-a-Friend

___________________________________

Tags:
307728_Coupon Savings - 468x60
Blog Widget by LinkWithin